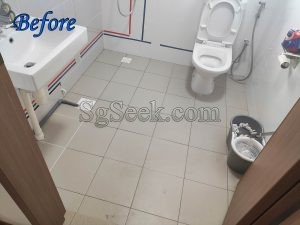
Grouting of a floor is a construction and home improvement process that involves filling the gaps or joints between tiles, stones, or other flooring materials with a special mixture known as grout. This process serves both functional and aesthetic purposes, contributing to the overall durability and appearance of the floor. Here is a detailed description of the grouting process for a floor:Surface Preparation: Before grouting, it is essential to ensure that the floor surface is clean, dry, and free from debris, dust, or any adhesive residue. The tiles or stones should also be firmly set in place. Any damaged or loose tiles should be replaced or re-adhered before proceeding.
Selecting Grout: Choose the appropriate type and color of grout based on your floor’s design and the materials used. Grout is available in various formulations, including sanded and unsanded grout, epoxy grout, and a wide range of color options.
Mixing Grout: Follow the manufacturer’s instructions for mixing the grout. Typically, you’ll need to combine the grout powder with water to create a paste-like consistency. It’s essential to achieve a smooth and lump-free mixture.
Application: Apply the grout onto the floor surface, spreading it evenly into the joints between the tiles or stones. A rubber float or a grout float is often used for this purpose. Work in small sections to prevent the grout from drying before it’s properly worked into the joints.
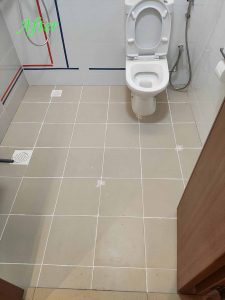
Filling Joints: Push the grout into the gaps, ensuring it completely fills the spaces between the tiles or stones. Make sure the grout lines are level with the tile or stone surface. Excess grout can be removed using the float or a grout scraper.
Cleaning Excess Grout: Once the grout has set for a short period (usually around 15-30 minutes), use a damp sponge to wipe away excess grout from the surface of the tiles or stones. Rinse the sponge frequently to keep it clean.
Curing and Sealing: Allow the grout to cure for the recommended period, which is usually 24-72 hours, depending on the type of grout used. During this time, it’s crucial to keep the grout lines moist to promote proper curing. After curing, consider applying a grout sealer to protect the grout and make it more resistant to staining and moisture.
Final Cleaning: After the grout has fully cured and any sealer has dried, give the floor a final cleaning to remove any remaining haze or residue from the tiles or stones. A clean, damp cloth or sponge should be sufficient for this purpose.
Grouting not only enhances the structural integrity of a floor by preventing moisture infiltration and tile movement but also plays a significant role in the floor’s aesthetics. Properly executed grouting can significantly impact the overall look and feel of the space, making it an essential step in floor installation and maintenance.